Content:
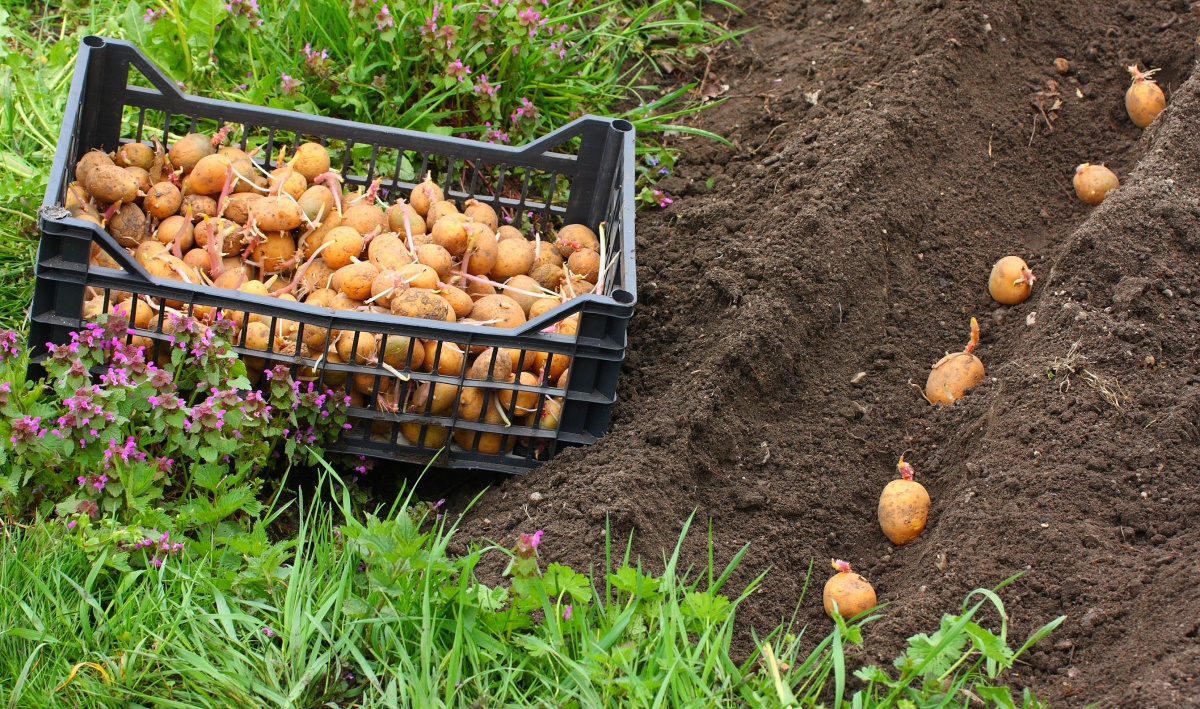
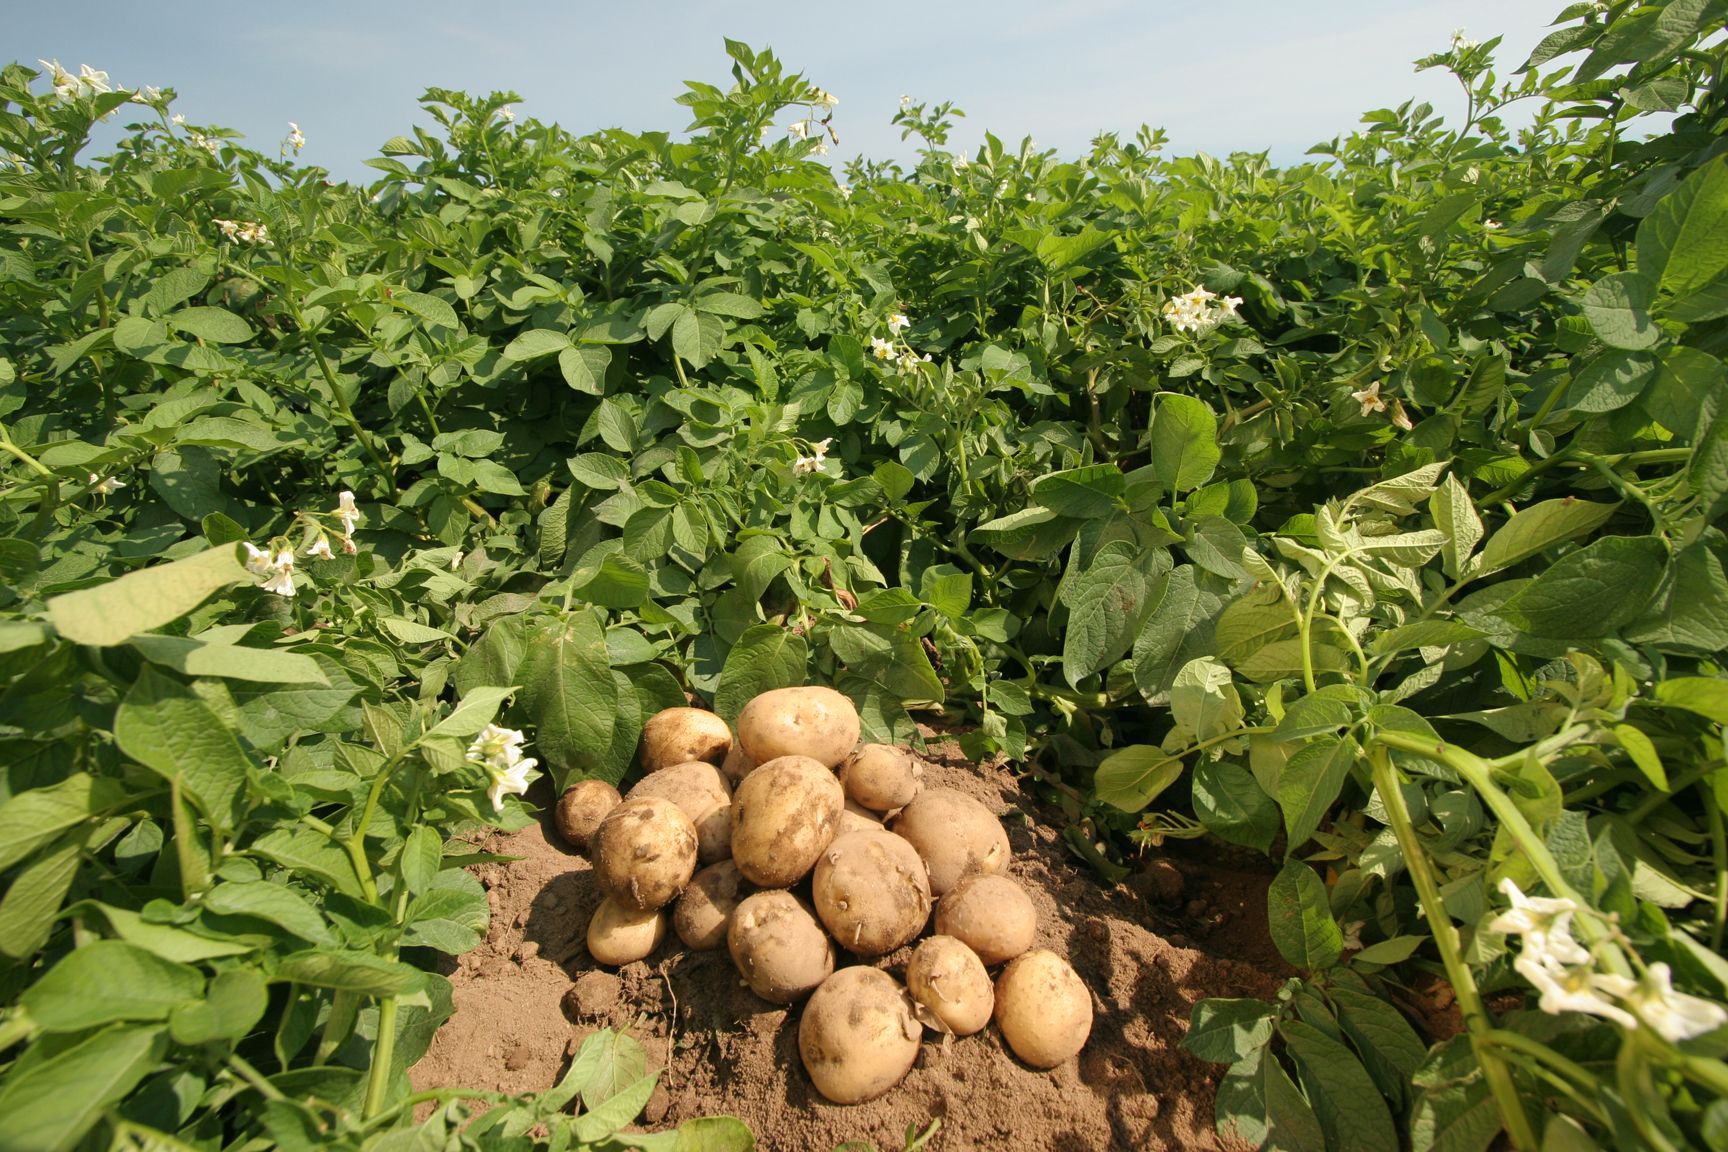
To increase the yield of potatoes, it is necessary to spud the plant several times per season. Hilling consists in the fact that earth is poured onto the grown potato bush, and as a result, an earthen hill is gradually formed around it.
Due to the fact that potatoes grow in soft soil in ridges, their number and size of tubers increase. Also, the loss of moisture by the bush is reduced, during hilling, the roots of the weeds are cut, and the site is clean.
Hilling is usually carried out two to three times per season. The first time - when the height of the plants is not more than 10 cm. The second time - 3-4 weeks after the first time. The last time - after the flowering of the potato bush. If the potato stalks are strongly stretched, then hilling is carried out more times.
When the site is small, you can add soil with a hoe. But if you need to huddle a lot of bushes, then it is quite difficult to do it manually.
For this purpose, special mechanisms are used, which are called hillers.
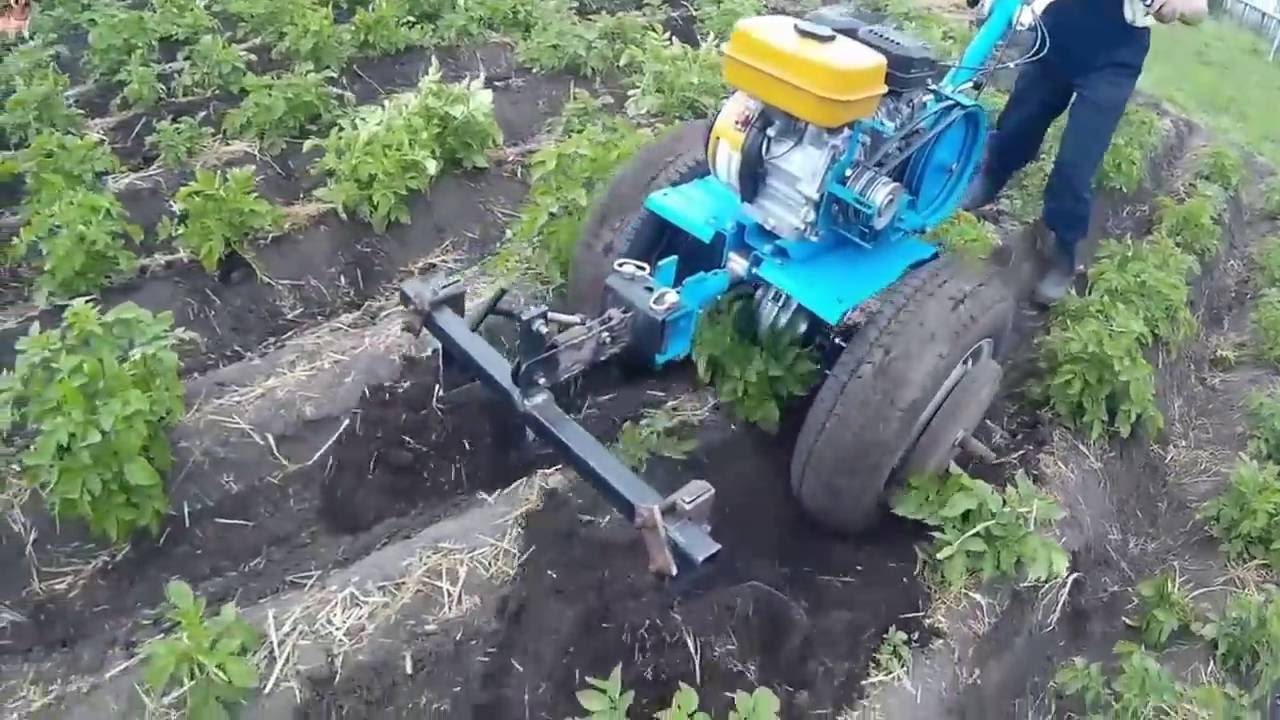
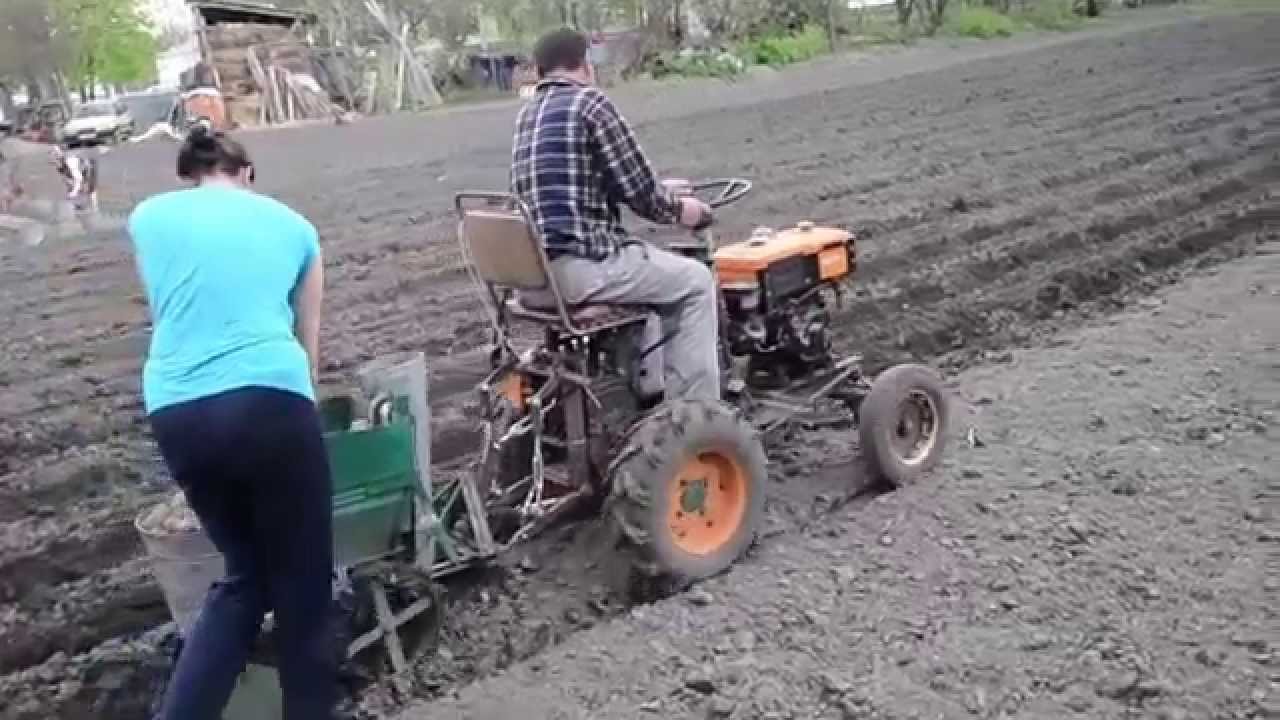
Hilling potatoes with a walk-behind tractor
Types of hillers
Depending on the degree of automation, a distinction is made between manual and automated mechanisms. With the help of automated hillers, you can hilling potatoes with a walk-behind tractor, tractor, mini-tractor.
By functionality, active and passive devices are distinguished. Passive - intended only for hilling. With the help of active mechanisms, planting, weeding and even harvesting are additionally automated. Active - usually additionally equipped with a rotor.
Depending on the design, there are:
- plow or lister mechanisms;
- disc potato pickers;
- propeller devices.
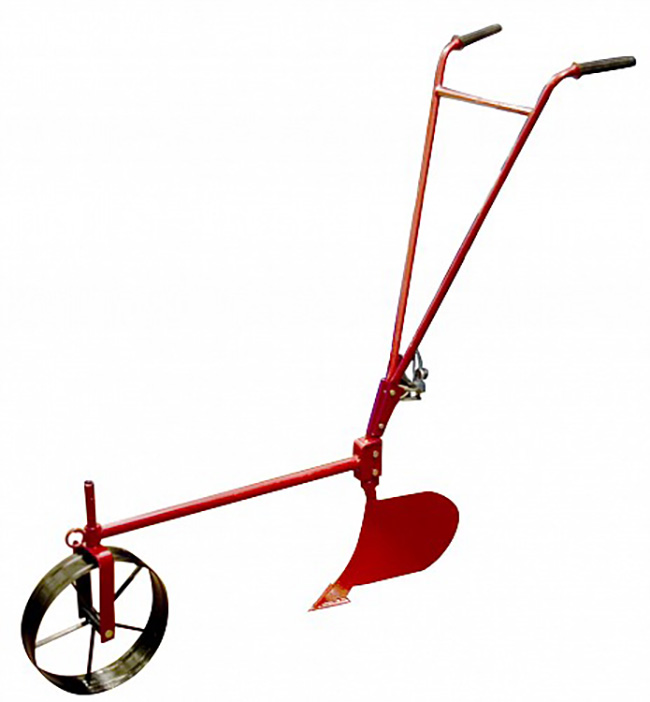
Lister hillers
This is the simplest and most reliable type of hiller.

Lister hillers
Design
The main element that cuts the soil and moves it to the potato row is called a plow or a share.
It consists of two metal plates or ears welded on one side and connected with metal strips on the other. On the lower narrow side, a cutting part or a nose is welded to them.
The ploughshare is fixed to the stand, which, in turn, is attached to the bracket designed to connect the walk-behind tractor and the hiller.
One-row hiller can be purchased on the market. To speed up the processing of the site, you can double the plows on one hitch.
The more plowshares are installed on the mechanism, the more powerful the cultivator needs to be used for work. Also, a more powerful walk-behind tractor or cultivator will be needed when using a custom potato picker.

Desired result
Setting up a single row lister hiller
It is used to cultivate light soils. For a higher quality of ridges, it is advisable to pre-treat the rows with a cultivator.
Step 1 Vertical adjustment
In this step, the stroke depth is adjusted. A correctly adjusted stroke allows the plowshares to penetrate to the required plowing depth. For adjustment, the rack is moved relative to the lock. In order to be able to move and fix the rack in the desired position, several holes are drilled in the rack itself. Once the plow is at the desired height, this position is fixed with a bolt connection. If there is only one hole in the rack, then the height of this hiller is not adjustable.
Step 2 Setting the working width
If a lister mechanism is used, which provides for setting the working width, then in this case it is necessary to adjust the ploughshare to the required row width. This is achieved by changing the distance in the upper part between the wings or ears of the share.
Step 3 Adjusting the ploughshare verticality
Work structures should be positioned so that their plow axis is perpendicular to the ground.
Setting up a two-row lister hiller
It is most convenient to use not a single-row, but a two-row mechanism, since the potato row in this case is earthed simultaneously from both sides. However, such a device requires a more powerful walk-behind tractor or cultivator.
First, the distance between the shares is set. When performing this stage, it is important to place the elements in such a way that the noses of the hillers are located strictly in the center of the row spacing.
Further, the plowshares are deepened to the required depth and fixed in this position with bolted connections. We also check that the axes of the hillers are perpendicular to the ground surface.
Soil cultivation by lister mechanism
Before starting work, it is necessary to immerse the ploughshare to the required depth in the ground and check that the axis of the potato pusher is perpendicular to the ground.
After that, turn on the walk-behind tractor and move it along the aisles.
If the hiller deepens greatly during work, then the stand must be tilted slightly forward. Due to this, the nose of the share will rise.
If the nose peeps out of the ground when moving, then the stand must, on the contrary, be tilted back.

Need to tilt your nose
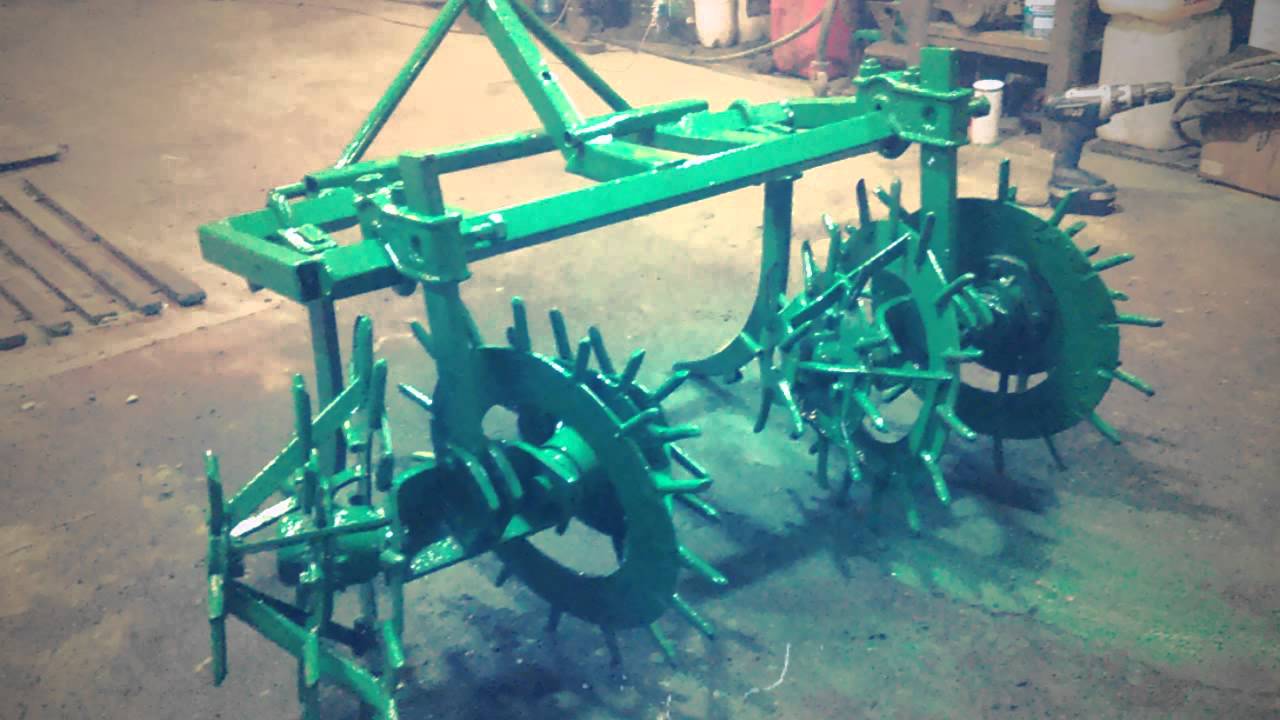
Disc hillers
A device of this type is one of the most common types of hillers.
Design and principle of operation
The working part of the mechanism has two convex metal discs with well-sharpened edges. In turn, the discs are fixed to stands attached to a metal frame.
Moving, the discs with a sharp edge cut and crush the earth. Due to the peculiar shape of the discs, an earthen ridge is automatically formed during movement.
This mechanism allows you to adjust the distance between the discs, adjusting the potato grower to perform work on row spacings of different widths. In the disc device, you can adjust the distance between the discs, the depth of loosening and the amount of soil from which the earth mound is formed.
Lister and disc hillers for hilling potatoes can be purchased at the store or made by hand. A large number of different types of hillers schemes can be found on the Internet.
Setting up the disk fixture
The adjustment is carried out in two stages:
- Stage 1 consists in setting the distance between the lower points of the disks. Usually it is 40-70 cm, depending on the size of the ridge;
- Stage 2 - regulation of the angle of attack, or the angle of rotation of the discs, relative to their horizontal axis. The amount of earth that is raked by the discs onto the hill depends on the set angle of attack. It is carried out using a special screw adjustment.
We configure the walk-behind tractor correctly
Hilling is done with a single-row, double-row or three-row device.
To work with a hiller, ordinary wheels are removed from the walk-behind tractor and lugs are installed, and only after that the device is attached.
Lugs are designed to make the mechanism heavier and improve its adhesion to the soil. On the market, you can purchase both universal devices and devices made for a specific model. For the most common models of Neva and Salyut motoblocks, the lug width is 43 and 50 cm, respectively, and the stud length is 15 and 20 cm.
The distance between the lugs for a single row hiller should be minimal, since both wheels move in the same row spacing.
Do not install the hitch on two pivots, as in this case a rigid connection is obtained. Also, a rigid coupling of the hiller and the walk-behind tractor is obtained if the backlash is removed. On the garden plot, there are always areas with denser soil. If the hiller falls on such a site, then the walk-behind tractor turns around a little. With a non-rigid connection, the force exerted by solid soil is not transmitted to the handles (the hitch plays out the force), and the walk-behind tractor goes straight, although the hiller itself wags a little at the same time. With such a connection, the row turns out to be more even, and the worker's efforts are spent much less.
Potato bed processing
Now let's look at how to spud potatoes using a walk-behind tractor. Before starting hilling potatoes, it is necessary to correctly install the mechanism on the ridge.
Unlike a lister device, for a disc device, the potato bed to be cultivated must be between the discs.
After the first row has been processed, the walk-behind tractor or cultivator is deployed and re-installed so that the bush is located between the discs. With the help of a disc hiller, you can process potato ridges in the forward and reverse direction, using the reverse gear of the walk-behind tractor.
To increase the power of the walk-behind tractor when hilling on heavy soils, a creeper is additionally installed on it. In this case, an increase in power occurs due to a decrease in the speed of the mechanism and an increase in torque. Fix it on the body of the walk-behind tractor. Especially this device will be in demand if an air-cooled walk-behind tractor is used.
The use of a hiller for processing potatoes significantly reduces human labor and time. A properly selected and configured hiller for specific tasks will allow you to quickly hilling a potato plot of any size.