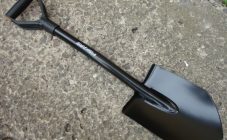
The shovel is one of the most important tools for gardening and construction work. The handle is the most vulnerable part of the tool, periodically it requires repair or replacement. You can buy a shovel handle from a store or make your own.
Description
The shovel is a hand-held tool designed for digging, carrying and clearing. It consists of a tray (canvas) and a handle (handle). Usually it is chosen for the base, which must be sharp and durable. The handle is the last thing to pay attention to. Meanwhile, it is the handle for the shovel that is responsible for the convenience and quality of work.
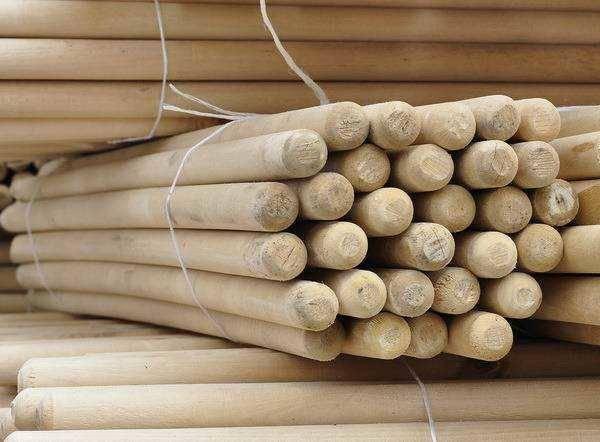
The finished products for sale in the store are made using special equipment. The production of cuttings for shovels in large batches is carried out thanks to the work of several machines:
- round-rod machine;
- circular grinding;
- backing.
Shank for bayonet and garden shovel
A bayonet shovel is used in the garden for digging up soil, performing all work related to sowing and caring for plantings. It has a rectangular blade, at the end of the handle is provided for a more comfortable grip. The tool should not put stress on the back and arms. Therefore, it is important to choose a comfortable handle.
A well-made handle for a bayonet shovel must meet several conditions. The length of the handle, the quality of the wood, the strength of the attachment to the base - all these factors affect the efficiency of the work.
Shovel handle
The plastic handle is lightweight, but fragile when bent and does not fit well in the hands, as it slides in wet palms. The durable and erosion-resistant aluminum shank has a longer lifespan. The aluminum handle is lightweight but cool.
Wooden material works well for bayonet shovels. Hands do not stick to it, there is no risk of chipping or breakage. Such a product is inexpensive, lightweight, and able to retain heat.
Stainless steel is a modern, durable and durable material. Such a canvas is more suitable for physically fit people. For example, the steel handle for the fiskars shovel has a special shape. The manufacturer made it hollow inside and very durable. The tool is suitable for working with clay and rocky ground.

Fiskars shovels
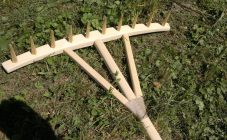
Usually a bayonet shovel has a straight handle. The scoop-type tool can be produced with a curved handle and a handle at the end. The handle at the top of the handle makes it easier to work, as it prevents the tool from rotating during operation.
The diameter of the handle for a bayonet shovel is within 34-40 mm. Its length is on average from 120 to 180 cm. For a shovel, the handle should be shorter. The shaft of a sapper shovel has the shortest length - no more than 80 cm.
There is also an improved telescopic model. The handle length adjustable for any height allows you to perform all types of gardening work.

Telescopic
Tips for choosing
Handle defects can become a serious obstacle to normal shovel use. Do not rush and buy the first copy that comes across. To choose the right handle option, you should know the characteristics of your bayonet shovel. The tools differ in size and thickness of the blade, subdividing into 3 categories: P, B, U. The correct handle is selected in accordance with these data.
Productivity and ease of use depend on the length of the handle. Usually the length of the handle is chosen depending on the height of the person. The shank should not reach the shoulder or elbow fold by 10 cm.
Homemade cutting
Making a homemade shovel handle is possible even for a novice master. If you make a little effort, then the technical qualities of the homemade product will not be inferior to the characteristics of the factory manufacturer. Required materials and tools:
- board, slab or branch;
- a circular saw;
- electric planer;
- manual plane;
- screwdriver;
- self-tapping screw.
Shovel handle - manufacturing begins with the choice of material. The strength of the product, as well as its appearance, depends on the quality of the wood. The most popular and affordable is birch wood. You can purchase an inexpensive blank or look for material at a sawmill. It is advisable to find a tree without flaws (knots, bends, curved fibers).
A branch or board is dried in the sun for 15-20 days. After drying, the diameter of the branch becomes smaller. You can skip this step when using a custom blank.
Work progress:
- The dried branch is treated with a plane, bringing to the desired diameter. After that, the handle is sanded with sandpaper. If a board is used as a material, then it is processed with a circular saw and an electric planer until a rectangular rail with a 3X4 section is obtained.
- You need to decide on the shape of the future handle. Most pre-made shovel handles are round. To create a round cut, you need to use a hand planer to smooth out the corners of the workpiece. But the rectangular handle has the advantage that it will not slip and twist out of the hands.
- The end of the handle should be gradually sharpened, constantly trying it on to the bayonet so as not to remove too much wood.
- The sharpening of the bar continues until it begins to enter the bayonet halfway through the groove. When processing the end of the cutting, consider the bend and unevenness of the groove.
- The pointed end of the handle is beveled towards the shovel blade so that it can freely enter the soil.
- A properly sharpened handle will easily fit 2/3 into the shovel. Its further advance to the end of the groove needs help. The shovel turned upside down is hit against a hard surface in order to plant the handle into the shovel until it stops.
- For reliability, it is fixed in the groove using a self-tapping screw or a nail. You can use epoxy as a sealant. The pointed end is coated with epoxy around the circumference, put on a shovel, again poured with resin, then the cutting is set to the desired depth. The resin must be allowed to dry for 24 hours.
- Irregularities on the handle are smoothed with sandpaper. To protect the wood, you need to cover it with a waterproof varnish. A handle can be attached to the rear end of the handle for convenience.
The shovel handle is ready.
Experienced craftsmen recommend not to varnish. It is better to apply impregnation and sand the surface. Sequential sanding with coarse and fine fractions polishes the wood and gives it strength.